Written by : humayrarumaysa
Title : Phase II: the barn room
Phase II: the barn room
To recap, we are currently working on Phase II: turning the original attached barn into living space.
The barn attaches to the house via the kitchen, as seen in this first photo. The bottom floor of the barn was converted into a three-car garage during Phase I. (click to view post)
The main floor of the barn will have a barn room which will be our "great room", a mud room which provides access to/from the garage, a small storage room, and stairs to the loft- which sits above the mud and storage rooms.
The barn itself dictated the size of each room via its original design. By "listening"to the structure we have been able to keep a lot of "real estate" per square foot which is always a good thing. When we first imagined a barn room in the space we briefly (very briefly) thought about using the entire barn (all 27' x 38' with a 32' ceiling) as the barn room, but it was just too, too big for the size and scale of the rest of the farmhouse. Scale and proportion are extremely important to me and it wouldn't "feel" right to walk in to such a huge room from the relatively small scale of the main house. For scale reference the barn room is 23' x 27' and has 12' 4" ceilings. For design reference I want the barn room to have more of a European-barn than a rustic-barn feel. To me that means rustic in materials, yet with beautiful furniture, fabrics and art.
I realize it is difficult to "see" how everything connects and comes together, so please ask for clarification if needed.
(In this post I will focus on the barn room and show you the mud, storage and loft rooms in a different post.)
Kitchen doorway into the barn. The board on the floor covers up the five steps down into the barn room.
(Antique transom added during Phase I.)

before
When we purchased the property the barn was an actual livestock barn.
Sadly, we don't have many photos of the interior of the barn as we were so focused on house photos. This is how the space that is to be the barn room looked when we found the property.
 |
before
Northwest corner of the future barn room.

This is the same northwest corner (as above) of the room after it was framed for new windows in Phase I. The entire room was framed to provide a squared room when finished.
This is the same northwest corner (as above) of the room after it was framed for new windows in Phase I. The entire room was framed to provide a squared room when finished.

This view shows the stairs into the kitchen (notice the brick fireplace on the far back wall for reference.) The opening to the right of the steps is the half bath which is accessed from the barn room. This space was added on to the barn in Phase I. It is the only bathroom on the first floor of the farmhouse. Just to the left of the steps is the framework for one of the new french doors.


Interior view of above photo.

Phase II
This is the east wall and faces the back meadow.
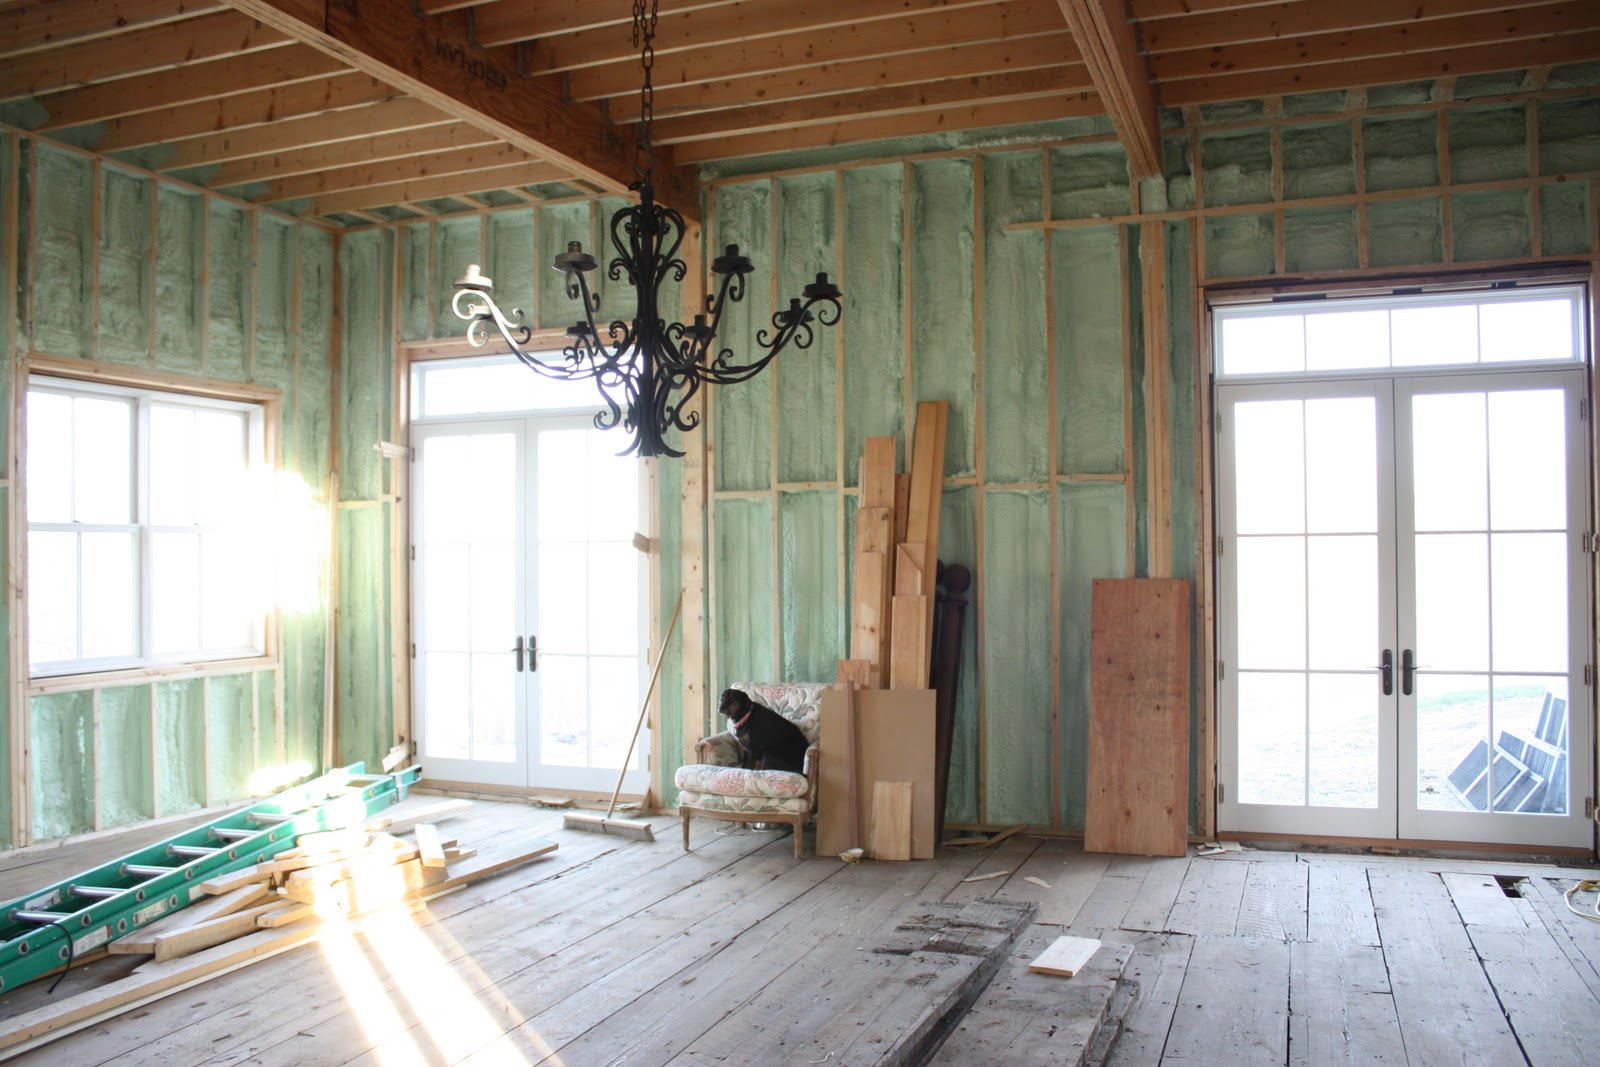
There will be a gravel patio off of the french doors. Same view as above with soy-based blown-in insulation on the walls. The 4-foot Craigslist find chandelier was temporarily hung in the room so that I could see the scale. Between the two french doors (where Ella is sitting on the chair) will be a large fireplace. The addition of this fireplace will give the farmhouse a total of 4 fireplaces and 5 rooms with a fireplace! (the kitchen/dining room share a fireplace) The fireplace finish will be stucco and incorporate an antique beam as a mantle, and a large slab of granite as the raised hearthstone- both from the property, removed from the barn during Phase I of the renovation.
This is the south wall.
This view is similar to the 4th photo showing: the entrance into the kitchen (under the added transom), the half bath door to the right of that opening, and the new french door.
All of the walls in the barn will be covered in random width (8"/10"/12") ship lap pine. In the barn room the boards will be hung vertically with the smooth side out. The walls will be painted gray. The engineered structural beams in the room will be wrapped in old barn wood and the ceiling boards will have a white-washed finish.

This is the west wall of the barn room.
The original barn door (encased in plastic in this photo to protect from the insulation installation) will be hung using its original rolling-rail hardware, and moved to the wall in the photo above- immediately to the right of the half bath door. The wall that the door is currently resting on in this photo will be enclosed. The open area under the ladder will become a doorway that takes you to the barn mud room, the storage room and the stairs into the loft.
A pair of antique iron doors from Argentina, found locally, (solid on the bottom open on the top) will be used in the doorway to "visually" divide the barn room from the mud room. (The small storage room sits behind the barn door is in this photo. The area you are looking into behind the barn door on the second level is the loft. And, for reference... the master closet sits directly above the barn room ceiling- the two small, square windows above the french doors as viewed from the exterior.)
I will hang a much-loved collection of approximately 50 antique herbariums on this wall.

This is the north wall (as seen in the 2nd and 3rd photos above.)
Between the two windows will hang the (gulp...........) "man-sized" TV. A 65-inch plasma with mega sound system . It is the TV watching room after all, but it is still a bit difficult to wrap one's decorating mind around this animal! ( I cannot tell you how happy I am to have those two windows there, or no telling how large the TV would be otherwise!!) Under the TV will sit a rather large antique French commode that we found at the Scott show in Atlanta. I'm hoping that its beauty will distract you from the behemoth TV..... ok, I'm praying!
(Dan just issued a request that all you husbands out there, like Carol's husband;), reading in bloggy-land chime in with your thoughts on the size of the TV. He says he needs backup!)
 |
update on the chimney: The stone mason starting the footing of the chimney. (note: This is approximately 12 feet below the threshold of the french doors in the photo below... in other words- he had a long way to go!)  Scaffolding for the chimney.  ...more scaffolding!   Making a "tent" so the mason can work through the winter!  Carry on men! With the heater going inside the tent it's a good 70 degrees- they work in t-shirts!  Inside the tent today.... this started to happen- reciprocating saw cutting out the opening into the barn room.  Which looked like this on the inside (saw blade coming through the barn room wall.)  which became this...  and turned into this....  oh wait... I changed my mind- I don't think I want a fireplace there after all!!!! and, just to be clear.... so you do not think that this is project is easy on any front.....  (Dan just said it is minus 30C!) Luckily, those temperatures only lasted a couple of days. Currently it's a balmy 22 degrees! |

Thus our article entitled Phase II: the barn room,do you like the article hopefully this article can benefit you all.
You are reading the article Phase II: the barn room and this article the permalink url is http://humayrarumaysa.blogspot.com/2011/01/phase-ii-barn-room.html Other articles you are looking for xxxxx