Written by : humayrarumaysa
Title : the making of the barn mud room...
the making of the barn mud room...
Before I show you the finished barn mud room (next post) I want to walk you through the process of how the room came to be.
When we bought the farmhouse, the barn was a real (though in poor condition) livestock barn that was attached to the farmhouse via the "ell"- the ell is now the kitchen (on the first floor) and the master bath (on the second floor.) The entire barn from the roof to the windows to the structural support needed work to ensure that it would stand for decades to come.
The luxury of having an attached barn (many antique barns in New England are not attached) enabled the vision of using the space as a "great room"- a space which was lacking in the farmhouse, to come to life. Since the farmhouse didn't have a garage we also designed a three-car garage to be dug out and placed in what was the basement of the barn underneath the main floor. We would use the majority of the main floor as a great room, a.k.a. - our "barn room."
Opening up and using the entire barn (all three above-ground levels) as one huge barn room was very briefly contemplated early on in the design process. I think scale and proportions are essential design elements which are often overlooked and using the entire barn for the "barn room" didn't fit with the rooms in the farmhouse. By making the design decision to not use the entire barn as one giant great room we were able to get the biggest and best use of our real estate.... more, and interesting, and well-scaled rooms that work graciously with the main house.
It was around this same time early in the design process that the possibility to use space from the third floor of the barn as the master closet became a reality and became our master closet. (floor plan here) Then, there was the need to get from the garage below up to the barn room/main floor, so a "mud room" was needed. In deciding where stairs would go to the garage below and how to use the entire space of the barn to our best advantage we looked no further than the existing "rooms" that were already present in the barn. By doing so we were able to get the following rooms under the one barn roof: a large barn room, a mud room, a storage room, a loft and the master closet.
It was during Phase II of renovations that the whole barn was engineered, shored up and renovated to become living space. I wanted to remain true to the structure and the fact that it was and is indeed.... a barn. Not one panel of sheet rock or a bit of plaster was used on the walls - instead an inordinate amount of wood was used to retain that original "barn" feel.
It was decided that the stairs from the garage below to this main floor would be placed in this small room in the southwest corner of the barn which we named the "mud room." It originally had three stalls for livestock, each with its own individual small square window that we would later renovate to match. The third stall is just to the right of the partition on the right. The name "mud room" has become a bit of a misnomer. My initial design for the mud room included a bench and an area for wet/muddy/snowy shoes and boots, but in reality (as you will see next post) we just didn't use the room as originally intended. Instead, we leave dirty shoes in the garage below and take our coats up to the master closet since we have no formal coat closet on the main floor.

The third stall. The wall on the right in this photo remains and will divide this room from the "storage room" behind it which was originally the milking parlor and had open ramp access from the exterior.

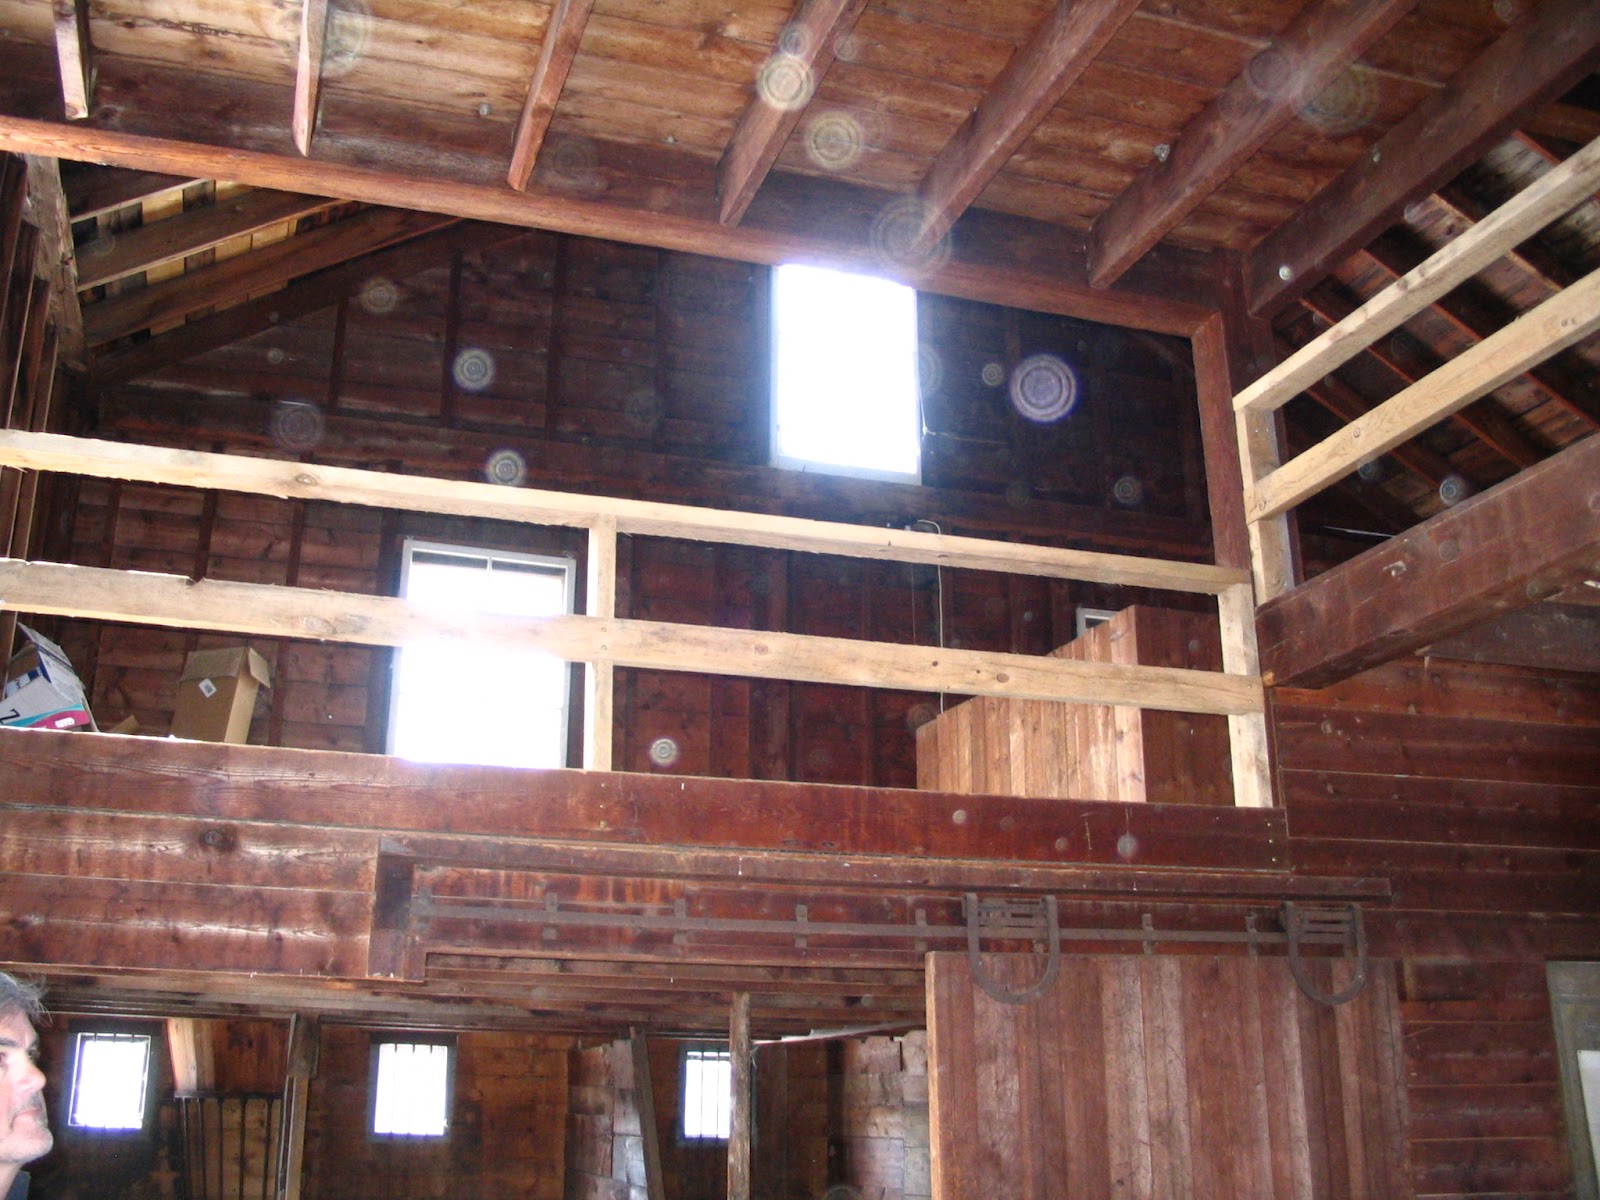
This photo gives a good overview for the use of the barn room's three floors (remember the garage will be underneath the barn.) The photo was taken standing on the main floor in what will become the "barn room." You can see the three square windows in the space that will become the "mud room", and the room to the right, on the same floor of the three windows will be the "storage room." The space on the second floor above where you see the two large windows in the vaulted space will become the "loft." And, the floor at the top of the photo will become the floor for the "master closet." Got that?!!
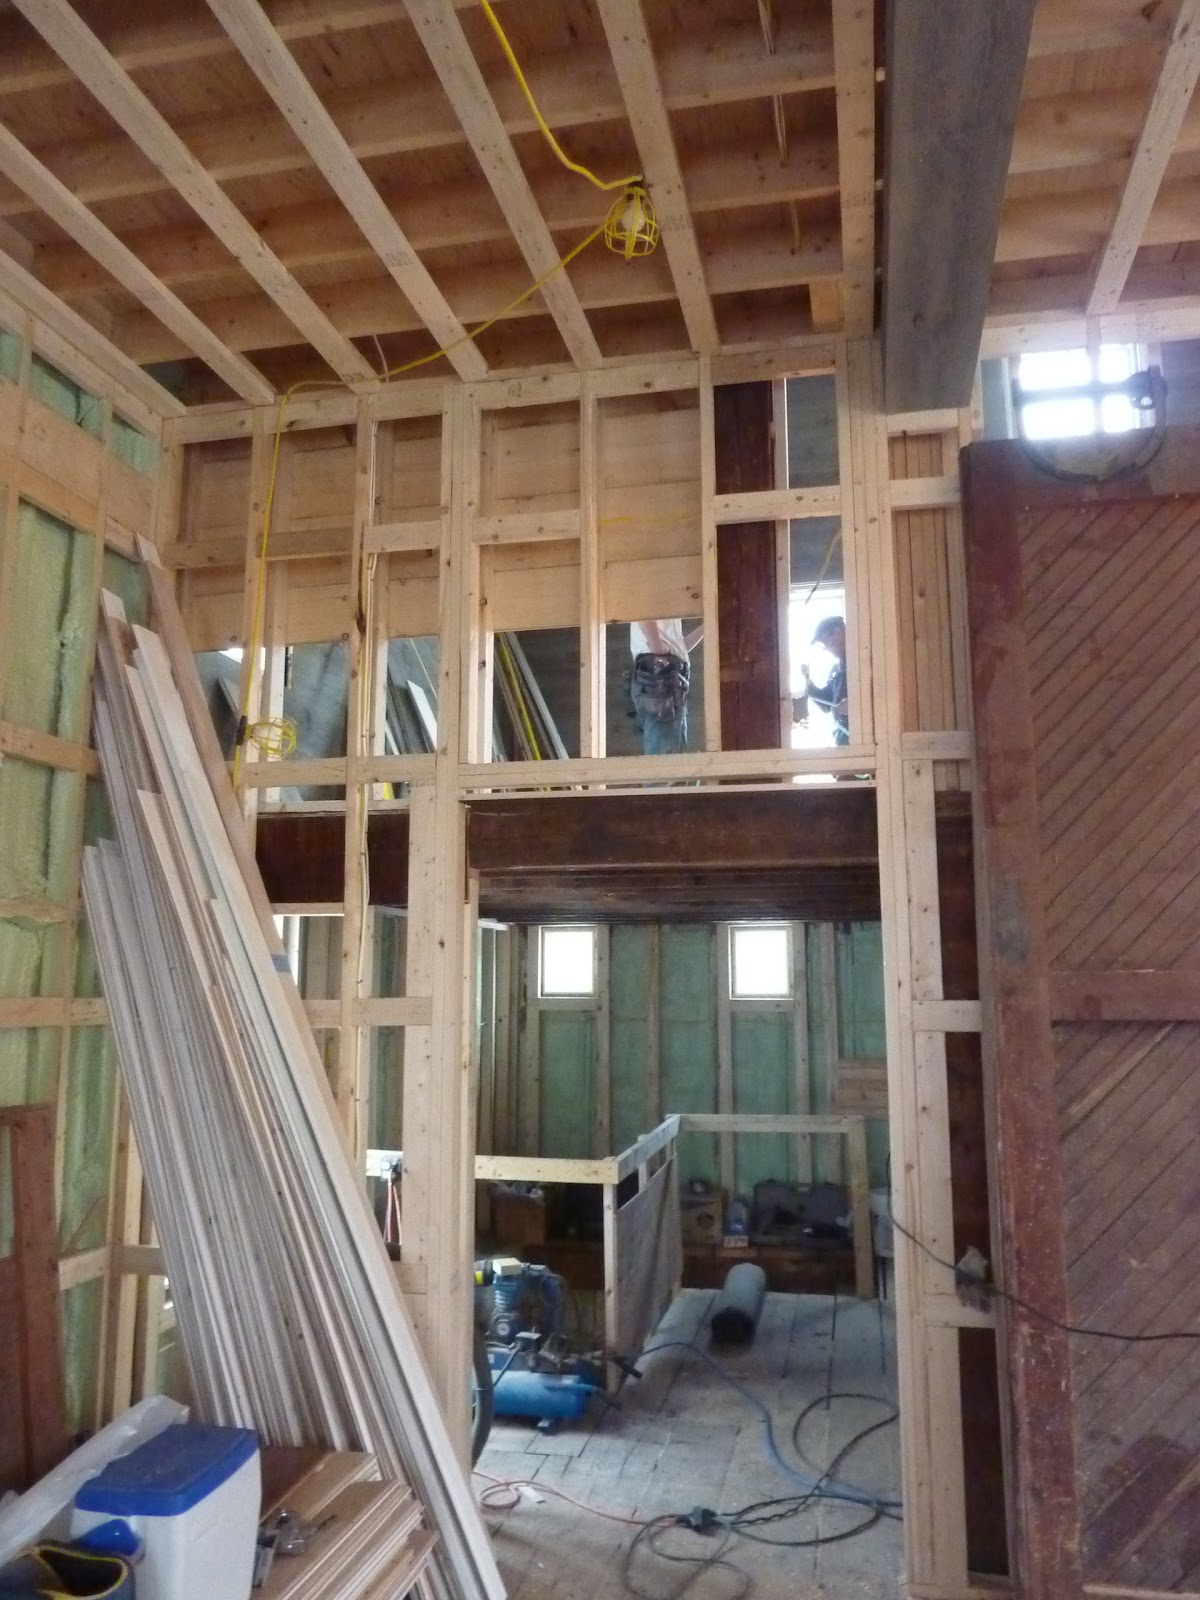
Same view, different perspective. I'm standing in the "barn room" on the main floor taking the photo. Dan is walking through the "mud room" and on the same floor, but behind the original barn door is the "storage room." The space above and behind the barn door on the second floor will be the "loft" and the ceiling in this photo is the floor of the master closet. See- I knew you'd get it!! (oh, and please note the antique posts leaning against the barn door that would later become the posts for the master headboard)

Before we got started in the barn mud room several layers of old flooring had to be removed down to the original planks. Let the renovation begin!


The mud room, as seen through the doorway to the left of the original barn door, ready for demo after layers of floorboards have been removed.

Antique iron gates from Argentina testing out the location that will be their new home!

A doorway to the right of the windows has been cut through the wall to access the space that will be the storage room (a.k.a. the "treasure room"- I think you're going to like that room ;)

Stairwell opening cut for the stairs from the garage below.


The new garage-to-main floor stairs being laid out .

The right angle turn in the stairwell.

Meanwhile outside, the barn is getting all new windows which exactly replicate the original two-over-two and small square windows.


The mud room with a fresh coat of blown-in closed-cell foam insulation (approximately R30 insulation value.)

Dan using the stairs for the first time! Behind Dan, in the wall on the left, is the tubing for the radiant heat flooring in the garage which is indeed a luxury, but since the garage sits under living space it also helps to reduce the cost of heating the barn during our cold New England winters.

Framed doorway where the iron gates will go. Temporary railing around the stairwell. The carpenters in this photo are working up in the loft.
Finished rough cut pine wall boards stained to look aged, installed horizontally. (My custom stain formula is on my sidebar.) Electrical wires protrude from the wall where fixtures will be placed that will illuminate art and light the stairwell at the same time..

The ceiling joists (which support the loft floor above) are original and you can see how low the ceiling is in this space. It just barely met code. The room was designed to be very utilitarian, but as the space came together it turned into a wonderful surprise as it is charming in its own right. The feeling that you get walking through this room with its very low ceiling and then emerging into the expanse of the barn room is almost magical. It is an effect that Bobby McAlpine talks about often in his book, The Home Within Us ; an effect that he intentionally designs in many of his homes because of its magical quality. It wasn't until walking through this space one day that I finally understood what I had read in his book months before.


This vertical original post (on the left side of the photo) was removed from another location in the barn during renovation, and was sanctioned by the engineer to be used here as structural support instead of the ugly metal pole he had originally specified. Thankfully the lead carpenter on our job was visionary and suggested this as a solution to an otherwise unsightly support pole. Note the original tethering ring. The wall immediately to the right of this structural beam will be cut open for the placement of the stairs to the loft.

here... .
The small room to the left of the stairs is the storage room.

Stained finish wall boards going up. You can just make out the tethering ring on the left of the photo for reference to the photo above.

And for a final view- looking from the mud room into the barn room as the very first floor board running the east/west expanse of the entire barn goes down.

Wasn't that fun??! See you next time with the finished space!
xojoan

Thus our article entitled the making of the barn mud room...,do you like the article hopefully this article can benefit you all.
You are reading the article the making of the barn mud room... and this article the permalink url is http://humayrarumaysa.blogspot.com/2012/03/the-making-of-barn-mud-room.html Other articles you are looking for xxxxx