Written by : humayrarumaysa
Title : renovation photo-story: the front landscaping and cobblestone walk
renovation photo-story: the front landscaping and cobblestone walk
While going through some photos from last year at this time I realized that I showed you the finished front, but never showed the complete process of the project. And for all the work that Dan and Big Blue put in, that's just not right!
This is the second post in my "renovation photo-story" series which shows projects from start to finish, so for those new here- this is a long one... grab a cup of coffee, or a glass of wine and watch the project unfold!
This is the second post in my "renovation photo-story" series which shows projects from start to finish, so for those new here- this is a long one... grab a cup of coffee, or a glass of wine and watch the project unfold!
The house as it looked "for sale" with its yellow paint and dark green shutters.

Are you seeing the potential?!

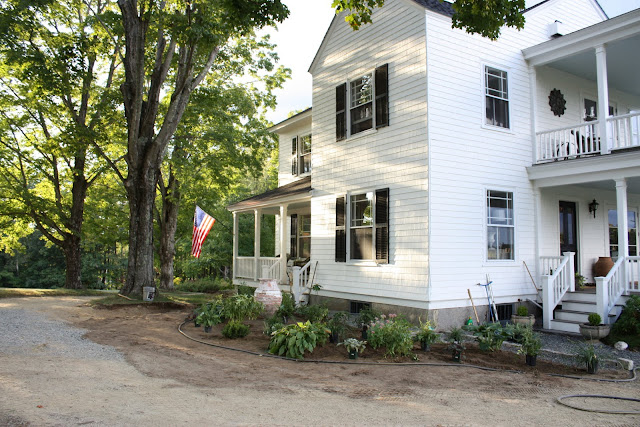
The house with its new white paint and black shutters. We placed gravel on the walkway the previous year as a temporary fix so that we wouldn't be bringing dust and rocks in the house from the existing dirt driveway.

The location for the front bed. You can see the original dirt drive in the forefront of the photo.

Let the fun begin!
Dan and Big Blue scrape up the top layer of weeds and patchy grass.
Dan and Big Blue scrape up the top layer of weeds and patchy grass.

We couldn't survive here without Big Blue. A local equipment rental rents Big Blue for $270 per day.... nor could we afford to not own her with the number of hours Dan spends on the tractor! We've owned her now for two years, and she just had her 400-hour tune up in July!

In the upper right of the photo you can see a mound with transplanted plants that had been removed from the bed area and were being saved to add back into the design.

Ella giving some sugar! You can't make out her tail in this photo because it's waggin'!
In case you are wondering, on the back of Big Blue is an aerator. It is weighted down with heavy stones to enable it to get deep into the ground.
And yes, that is a University of Oregon cap.... Dan is a duck;) , says this Longhorn!

The clean slate.
The gravel strip under the window is one of several french drains that we added around the perimeter of the house after an unfortunate incident with water in the basement;)

The outline for the bed was first laid out with a hose. I extended the bed beyond the corner of the house to visually enlarge the area and to balance the bed to the house.

Plant placement begins.
This gravel area is the side porch walk and will be bordered with cobbles.
This gravel area is the side porch walk and will be bordered with cobbles.

The antique yogurt pot, from Love Train Antiques (aka Mark Sage of Restoration Hardware) in Atlanta, moved with us from Dallas and was always an integral part of this garden design, so it was placed first. The plants in this photo are my larger "anchor" plantings.


The bed is planted with shrubs and perennials. It is predominantly whites along with some pink and purple accent plantings.

Plants are all planted, and an "English edge" is dug. An English edge is basically a small trench between the grass and the bed. It makes for a very natural look and is easy to maintain. I like a natural-looking bed, one I describe as "organized chaos"! I also plant things just a bit closer to each other, as I like the plants to touch and overlap when full grown for a softer effect.


The new gravel drive has been defined and laid, and the construction for the antique cobblestone walkway begins. The cobblestones are from a street in an old town in Massachusetts.

I designed the walkway to have a slight curve coming off of the granite stone landing at the base of the steps and then straight out to the drive. Dan drew a cardboard template of the curve I designed, and then flipped it- the stones were laid against the cardboard to get a perfect match.


This was my job (besides the design and stupervising ;)... measuring the cobbles and organizing them into the three different measurement groups to make Dan's job easier!

The under porch stone skirt was made by the stonemason we hired who turned out to be the "drunken mason". He was fired before he completed the entire skirt, so Dan had to finish the end of the porch. He had also been hired to build the walkway, so Dan had to do that too!


New sod.

The little green plastic garden seat on wheels has been with us for years. It has served its time in the garden back in Dallas and has even been known to act as a dolly for huge, heavy pieces of antique furniture! Its little wheels are a bit splayed from its dolly service, but he still gets the job done!

Same leather gloves, just before and after!

After the cobbles are laid the joints are filled with granite stone dust, which settles, compacts and hardens a bit.

Love the antique cobblestone walkway.... and the handy husband ;)!


Oops... looks like some of Dan's "stone mason juice" made it into the photo ;)


Almost complete!


The finished front, as it looked last year right after completion. 
This year...


Click Here to see the Finished Front and read about the "drunken mason" ;)

Thus our article entitled renovation photo-story: the front landscaping and cobblestone walk,do you like the article hopefully this article can benefit you all.
You are reading the article renovation photo-story: the front landscaping and cobblestone walk and this article the permalink url is http://humayrarumaysa.blogspot.com/2011/10/renovation-photo-story-front.html Other articles you are looking for xxxxx